I’ve written about lacrosse goalie arcs quite a bit on this blog. They’re a basic element of learning this position and something all beginners should learn early on.
But if you’re unaware of what the arc is, here’s a quick recap. A lacrosse goalie arc is an imaginary line in the form of a semi-circle running from post to post.
Being properly setup on the right spot on the goalie arc will ensure the goalie is occupying the maximum amount of space in the cage and require as little movement as possible to reach a shot to any spot within the 6’ by 6’ goal.
One topic that I haven’t written about and also doesn’t seem to get a lot time in the coaching camps is how to move correctly on the arc.
Too often I see goalies move lazily along the arc or in the incorrect method and not be 100% ready for a shot. Not being ready for a shot means goals given up.
This post is all about how I teach goalies to properly move on the lacrosse goalie arc.
Moving Adjacent on the Arc
There’s a few different styles of lacrosse goalie arcs but for the purposes of this post let’s assume you’re using a 5-point, normal arc.
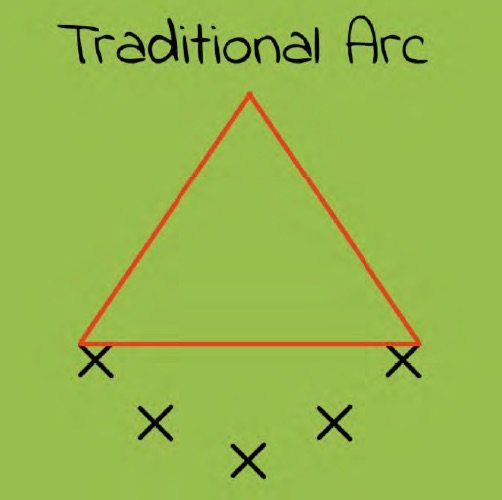
If you want to move to a point on the arc that’s adjacent to where you’re currently setup, it’s relatively simple.
Simply step with your lead foot first and follow with the other leg.
The step should be quick and aggressive and you should land in your perfect lacrosse goalie stance, ready to make a save.
Here’s a GIF of me demonstrating that quick, aggressive movement:
Notice how we’re not bringing the feet together when moving to an adjacent spot. Step with lead leg first and then follow with trail leg.
This technique covers any adjacent move on the arc.
Moving to Other Points on the Arc
Now within a lacrosse game there are going to be situations where the goalie needs to move to a point on the arc that is NOT adjacent.
For example, the offense has the ball TOP LEFT and they swing it all the way over to TOP RIGHT.
In this situation the goalie must move to a NON adjacent spot on the arc. In the example, the goalie will need to move from the left 45 degree spot on the arc to the right 45 degree spot on the arc.
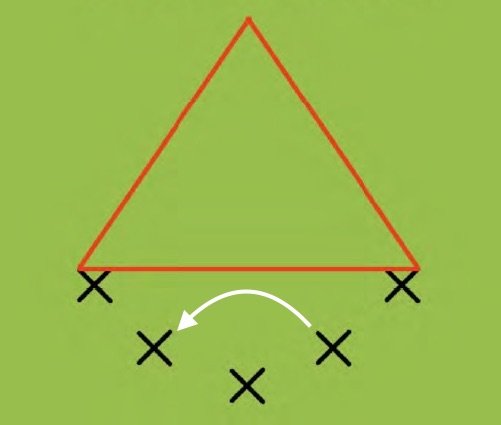
How is that done? The technique that I teach is a 2-step method:
- Drop Step
- Jump Stop
Drop Step
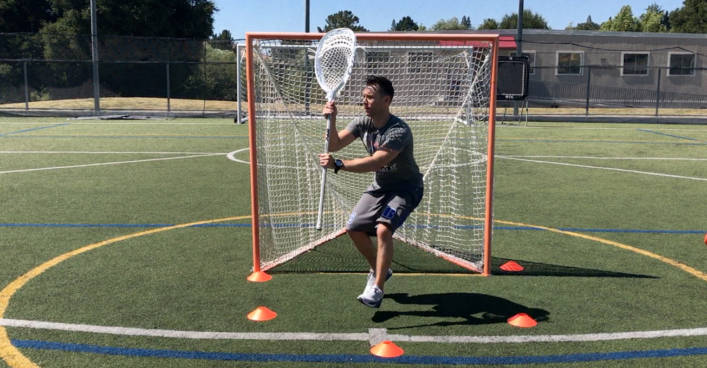
The first thing a goalie should do is drop step by opening up the hips and stepping back in the direction that you need to go.
The drop step is going to give the goalie the proper angle to move to the new spot on the arc.
It also ensures that as the goalie is arriving to the new spot on the arc you’re occupying more of the goal with your body.
Jump Stop
The second step is a jump stop.
For those who have played basketball you should already know how to jump stop. It’s one the first things you learn in organized hoops.
A jump stop is when a player comes to a stop landing simultaneously on both feet in a controlled, athletic stance. The reason we want the goalie to land balanced on both feet at the same time is because then they can explode in either direction depending on where the shot goes.
It’s important that you keep your head back in the jump stop. The head is the heaviest part of the body and if its over the center of gravity you’ll fall forward and not land in a balanced position, ready to the attack the shot.
Here’s a GIF of the drop-step / jump-stop combination in action:
A great lacrosse goalie should be able to drop step, jump stop and land 100% balanced in your stance. Every. Single. Time.
The drop step/ jump stop method works for moving from any spot on the arc to another spot on the arc (besides adjacent – which is covered above).
Drills to Practice Moving on the Arc
Walk the Arc
Setup cones along the goalie arc that you like to use. Similar to the Walk the Line drill, in the Walk the Arc we’re working on muscle memory and getting comfortable on the arc.
Just like Walk the Line, Walk the Arc is a drill you can do by yourself.
The idea is that once you remove those cones you should be able to move on the arc the exact same way.
Call Out Numbers
A drill I like to do with goalies is give a number 1-5 to each point on the 5 step arc.
The coach then calls out a number and the goalie moves to that spot on the arc using the drop step, jump stop method.
Make sure the goalie executes the right technique and then lands on the new spot on the arc 100% balanced and ready to make a save.
Do 5 sets of about 30 seconds ending each with a shot and save.
Sprint to Jump Stop
This drill adds in some conditioning while working on your ability to execute a jump stop.
Start on the GLE and sprint 10 yards and then land in a jump stop. If you can learn to jump stop and land balanced off of a sprint, you’ll have no trouble landing balanced when executing the move in the crease.
Sprint another 10 yards and jump stop. Continue to midfield. Do 5-10 sets depending on your level.
Technique for Moving on a Flat Arc
One of the benefits of playing a flat arc is that movement along the arc is much simpler.
If you’re a goalie who prefers to use a flat arc, the drop step / jump stop method can still be used to quickly arrive to non-adjacent spots on the arc.
Consider these different spots on a flat arc:
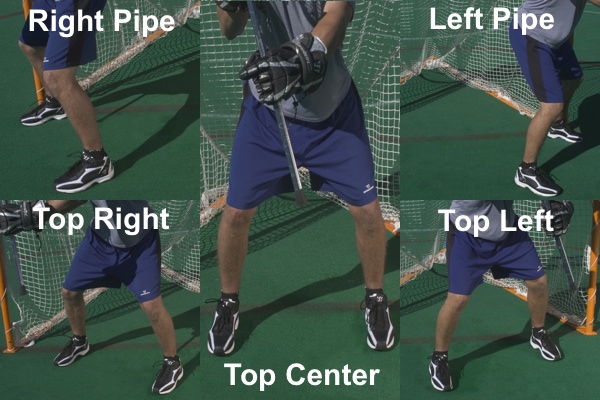
To go from TOP RIGHT to TOP LEFT, you can still use the 2-step method taught in this post however as you can see the movement won’t need to be as drastic.
Conclusion
Properly learning to move on the lacrosse goalie arc is an important and yet often overlooked element of making saves.
While others watch the ball, as a goalie coach I’m always watching the goalie when I watch games and highlights. Often times I see goalies not move properly on the arc and thus not arrive ready to make a save.
Regardless of your style of arc, you can use the drop step, jump stop method I describe in this post to properly move from one spot on the arc to another (non-adjacent) spot.
Until next time! Coach Damon
Any questions about moving on the lacrosse goalie arc? Leave me a comment down below.


 14 Amazing Lacrosse Goalie DrillsAug. 1, 2024
 Quick Guide To Lacrosse Slang TermsApril 14, 2025
 Lacrosse Goalies Rules To KnowJune 28, 2022
 Lacrosse Goalie Step-by-Step Guide to Getting RecruitedFebruary 6, 2022
 18 Lacrosse Goalie Drills to Improve Your GameApril 24, 2025
 7 Elements of a Great Lacrosse Goalie StanceAug. 1, 2020
 12 Lacrosse Goalie Tips To Take Your Game to the Next LevelSeptember 10, 2024
 STX Eclipse 3 Goalie Head ReviewApril 24, 2025
 Lacrosse Goalie WorkoutAug. 12, 2019
 The Basics of Making a SaveJune 29, 2021


















Hi Damon – One of the drills I use with my goalies is one called Pipe2Pipe. I have them explode to the other side of the goal pipe by doing a drop step, pivoting and pushing hard to the other side of the pipe with top hand high and leading with stick in a vertical plane. Ultimately ending with a jump stop with foot on the pipe and in a ready position.
Thanks, Rob
Good drill Rob. I like that one. Thanks for the comment!